Kontakt tutorial - Making of 'Simon V - Icebreaker' - Drum & Bass

Simon V - Icebreaker
Download Kontakt and Cubase files (5mb)
Notice
This tutorial was previously hosted at Native Instruments and written in 2007. Depending on your Kontakt version, you might need to reassign the MIDI and output channels after loading.
Drum and Bass with Kontakt
Thanks to its 16-part multimode architecture and powerful features, KONTAKT is a great full-blown sampler for making a complete production without needing any other plug-ins. You'll receive everything you need to work through the making of this track, from the original Steinberg Cubase arrangement to the KONTAKT multi-instrument file with all samples. This way you can load the entire song in Cubase and follow along in detail.
The Idea
I had an ascending bass pattern in my head for a while and really wanted to try it out in a piece. Usually the concept for a track begins by searching for inspiring sounds or rhythms. Then after selecting a tempo and key things get going.
Drums

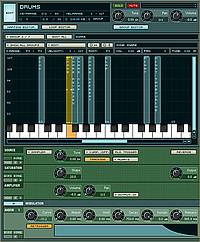
With KONTAKT’s Drag & Drop capabilities an individual drum kit for the track can be made very quickly. I lay the samples out in groups and assign them to individual outputs, so that each sound can be individually treated again in the mixer. Tip: Select all zones, right click on 'Each Zone -> 1 Group'. This makes work much easier.
You can edit each sound nicely using KONTAKT’s envelopes/pitching/filters/etc. And edit poorly cut samples in the loop editor.
The basic rhythm pattern was played via MIDI using the classic 'finger jamming' technique, quantized, and then fine-tuned with the mouse. I cut a few drum loops and placed them under the beat so that the foundation doesn’t sound too cold and digital. One of these is a tambourine loop that gives the track a constant groove right from the start.
The Amen drums build the escalation into the main section. A few fill-ins at the beginning or end of the bars bring some variation to the whole rhythm track.
Bass
This is the bas(s)is - like a piano accompaniment for a vocal track. Here I went straight for the PRO-53 instrument, which thanks to the filter section can conjure up some lovely bass sounds. A simple trick is to resample the desired sound and edit it using a high-pass filter to remove inaudible frequencies. Once you’ve done that, try adding a bit of distortion or saturation so the sound has more character.

The bassline for Icebreaker is built in three parts:
A sub bass can be felt in clubs and on good stereo systems.
It’s composed of a saturated sine wave usually. For differentiating between notes,
I added a distorted saw sound, which has more interesting harmonics,
but will also be used with filters for the main part.
Finally, there’s a midrange bass in there, to give the whole sound fullness and more movement.
It’s important that the three sounds cover different frequency ranges.

While searching for samples I was especially taken by a horn-like lead sound from an older track of mine. To fatten it up, there is white noise and a sampled synth underneath.
The strings provide harmonic support for the lead. They’re composed of a sawtooth patch and a choir-like sound.
To test the various elements, it should be enough to have a loop with a few bars - to hear if all elements sound smooth and work together. Only then it's time to start arranging the track.
Arrangement

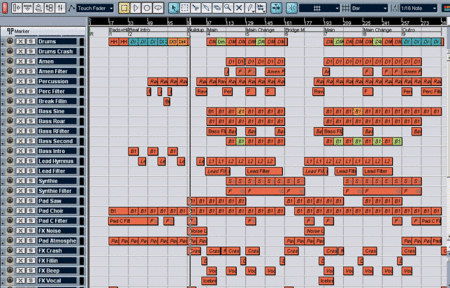
Now things get interesting: our small loop will become a complete arrangement. We’re going for a blend of DJ-friendliness and musicality. The intro builds up evenly with plenty of room to breathe, so that it can be nicely mixed in a DJ set. Around minute 1:30 the lead begins to unfold, rising with each part. In the middle comes a long breakdown for air, after which it moves forward again. The arrangement is generally speaking a 2-part wave.
Keeping things interesting comes down to trying things out along with a few basic considerations: how does the track start off, when does the main part enter the picture, and how do we keep it exciting all the way to the end. The best way to do this is by muting and soloing the individual tracks to see what stands on its own and what only works with other parts. Listen to the track from the beginning. If your instincts tell you a certain part gets boring, then you know that’s where something needs to happen in the track.
FX

This is like the icing on the cake. Whether it’s the drum fill in the intro, the vocal before the main section, or the quiet sounds in the background. A long delay as an instrument effect can provide space and deepness. The effects and modulation stage is also where KONTAKT really makes experimenting a pleasure. Try a sample backwards, run the drums through tone machine, hack loops with the envelope, stay creative.
Mixdown
"There’s no problem we can’t fix, because we do it in the mix".
In the beginning it’s enough to just set the volume of each track. Only then should you think about improving the sound with equalizers, filters, compressors, etc. Don’t play around with effects too much in the beginning: what didn’t work before isn’t necessarily going to get any better through effects and editing.
For a mixdown it’s always good to start with fresh ears, either after a break or the next day.
Enjoy making music,
Simon
